Honeybook is an online client management system that houses a variety of tools. From helping you collect inquiries, organize clients, plan projects, onboard and offboard clients, this platform is a must for running my business.
Why setting up your brand in Honeybook is important
First of all, why is it even important to set up your brand in Honeybook? Maintaining a professional, cohesive brand from the very first client touchpoint to the last is crucial to cultivating a memorable client experience. Customizing your Honeybook brand elements allows you to send files and communicate with your clients quickly and efficiently.
Ensure a seamless experience for not only your client but yourself as a business owner. The last thing you need to be worried about is triple-checking that your brand is all setup and ready to go in your client management system.
Now that we got that out of the way, let’s get into how to actually set up your brand in Honeybook
How to Set Up Your Brand In Honeybook
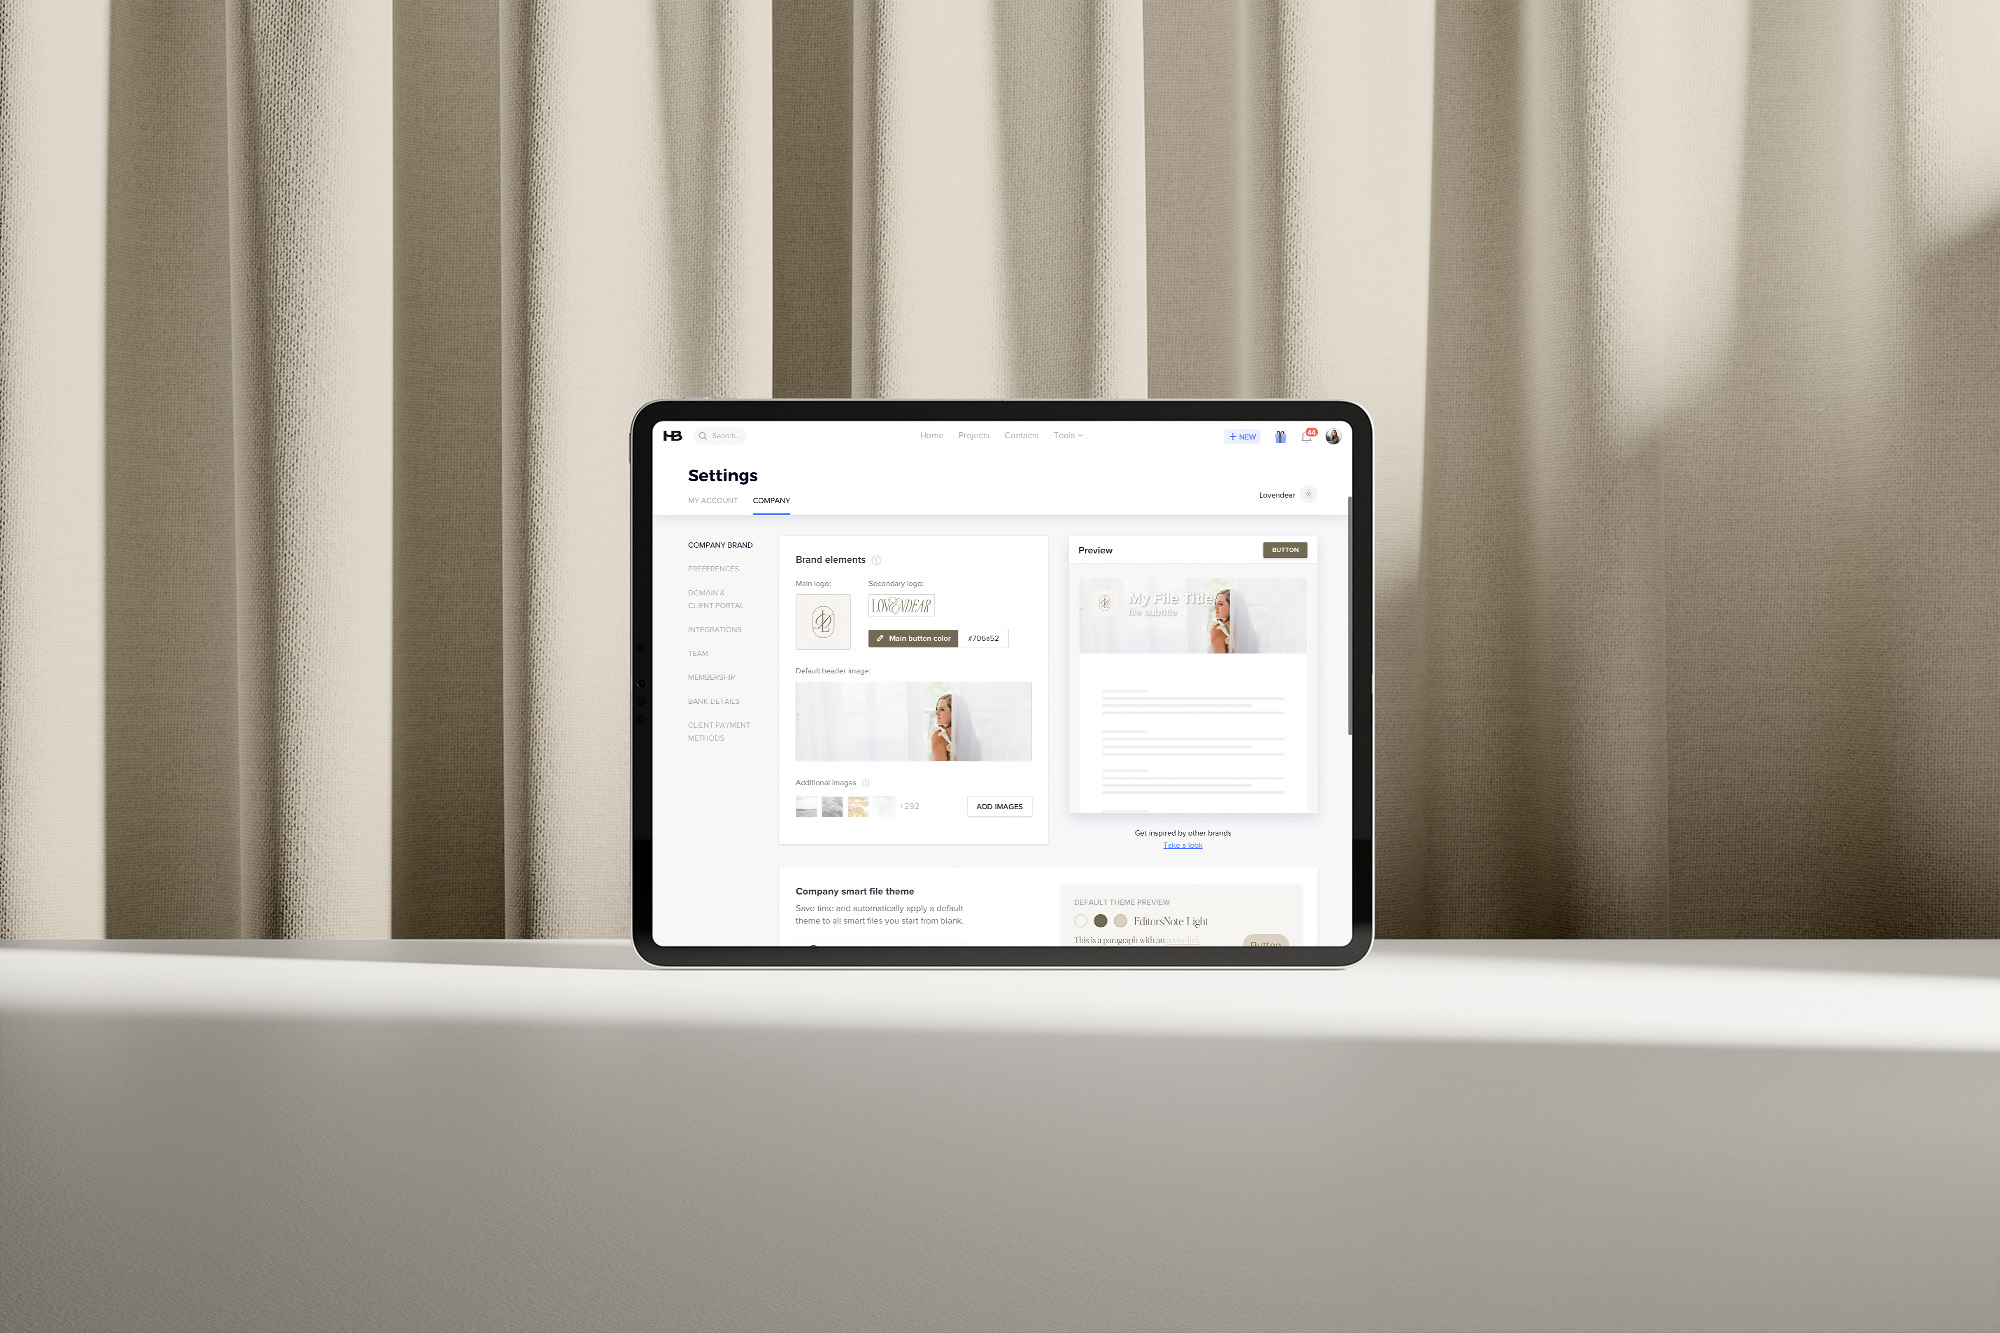
- Navigate to your company settings by hovering over your profile photo in the top right corner of your browser and select ‘company settings’.
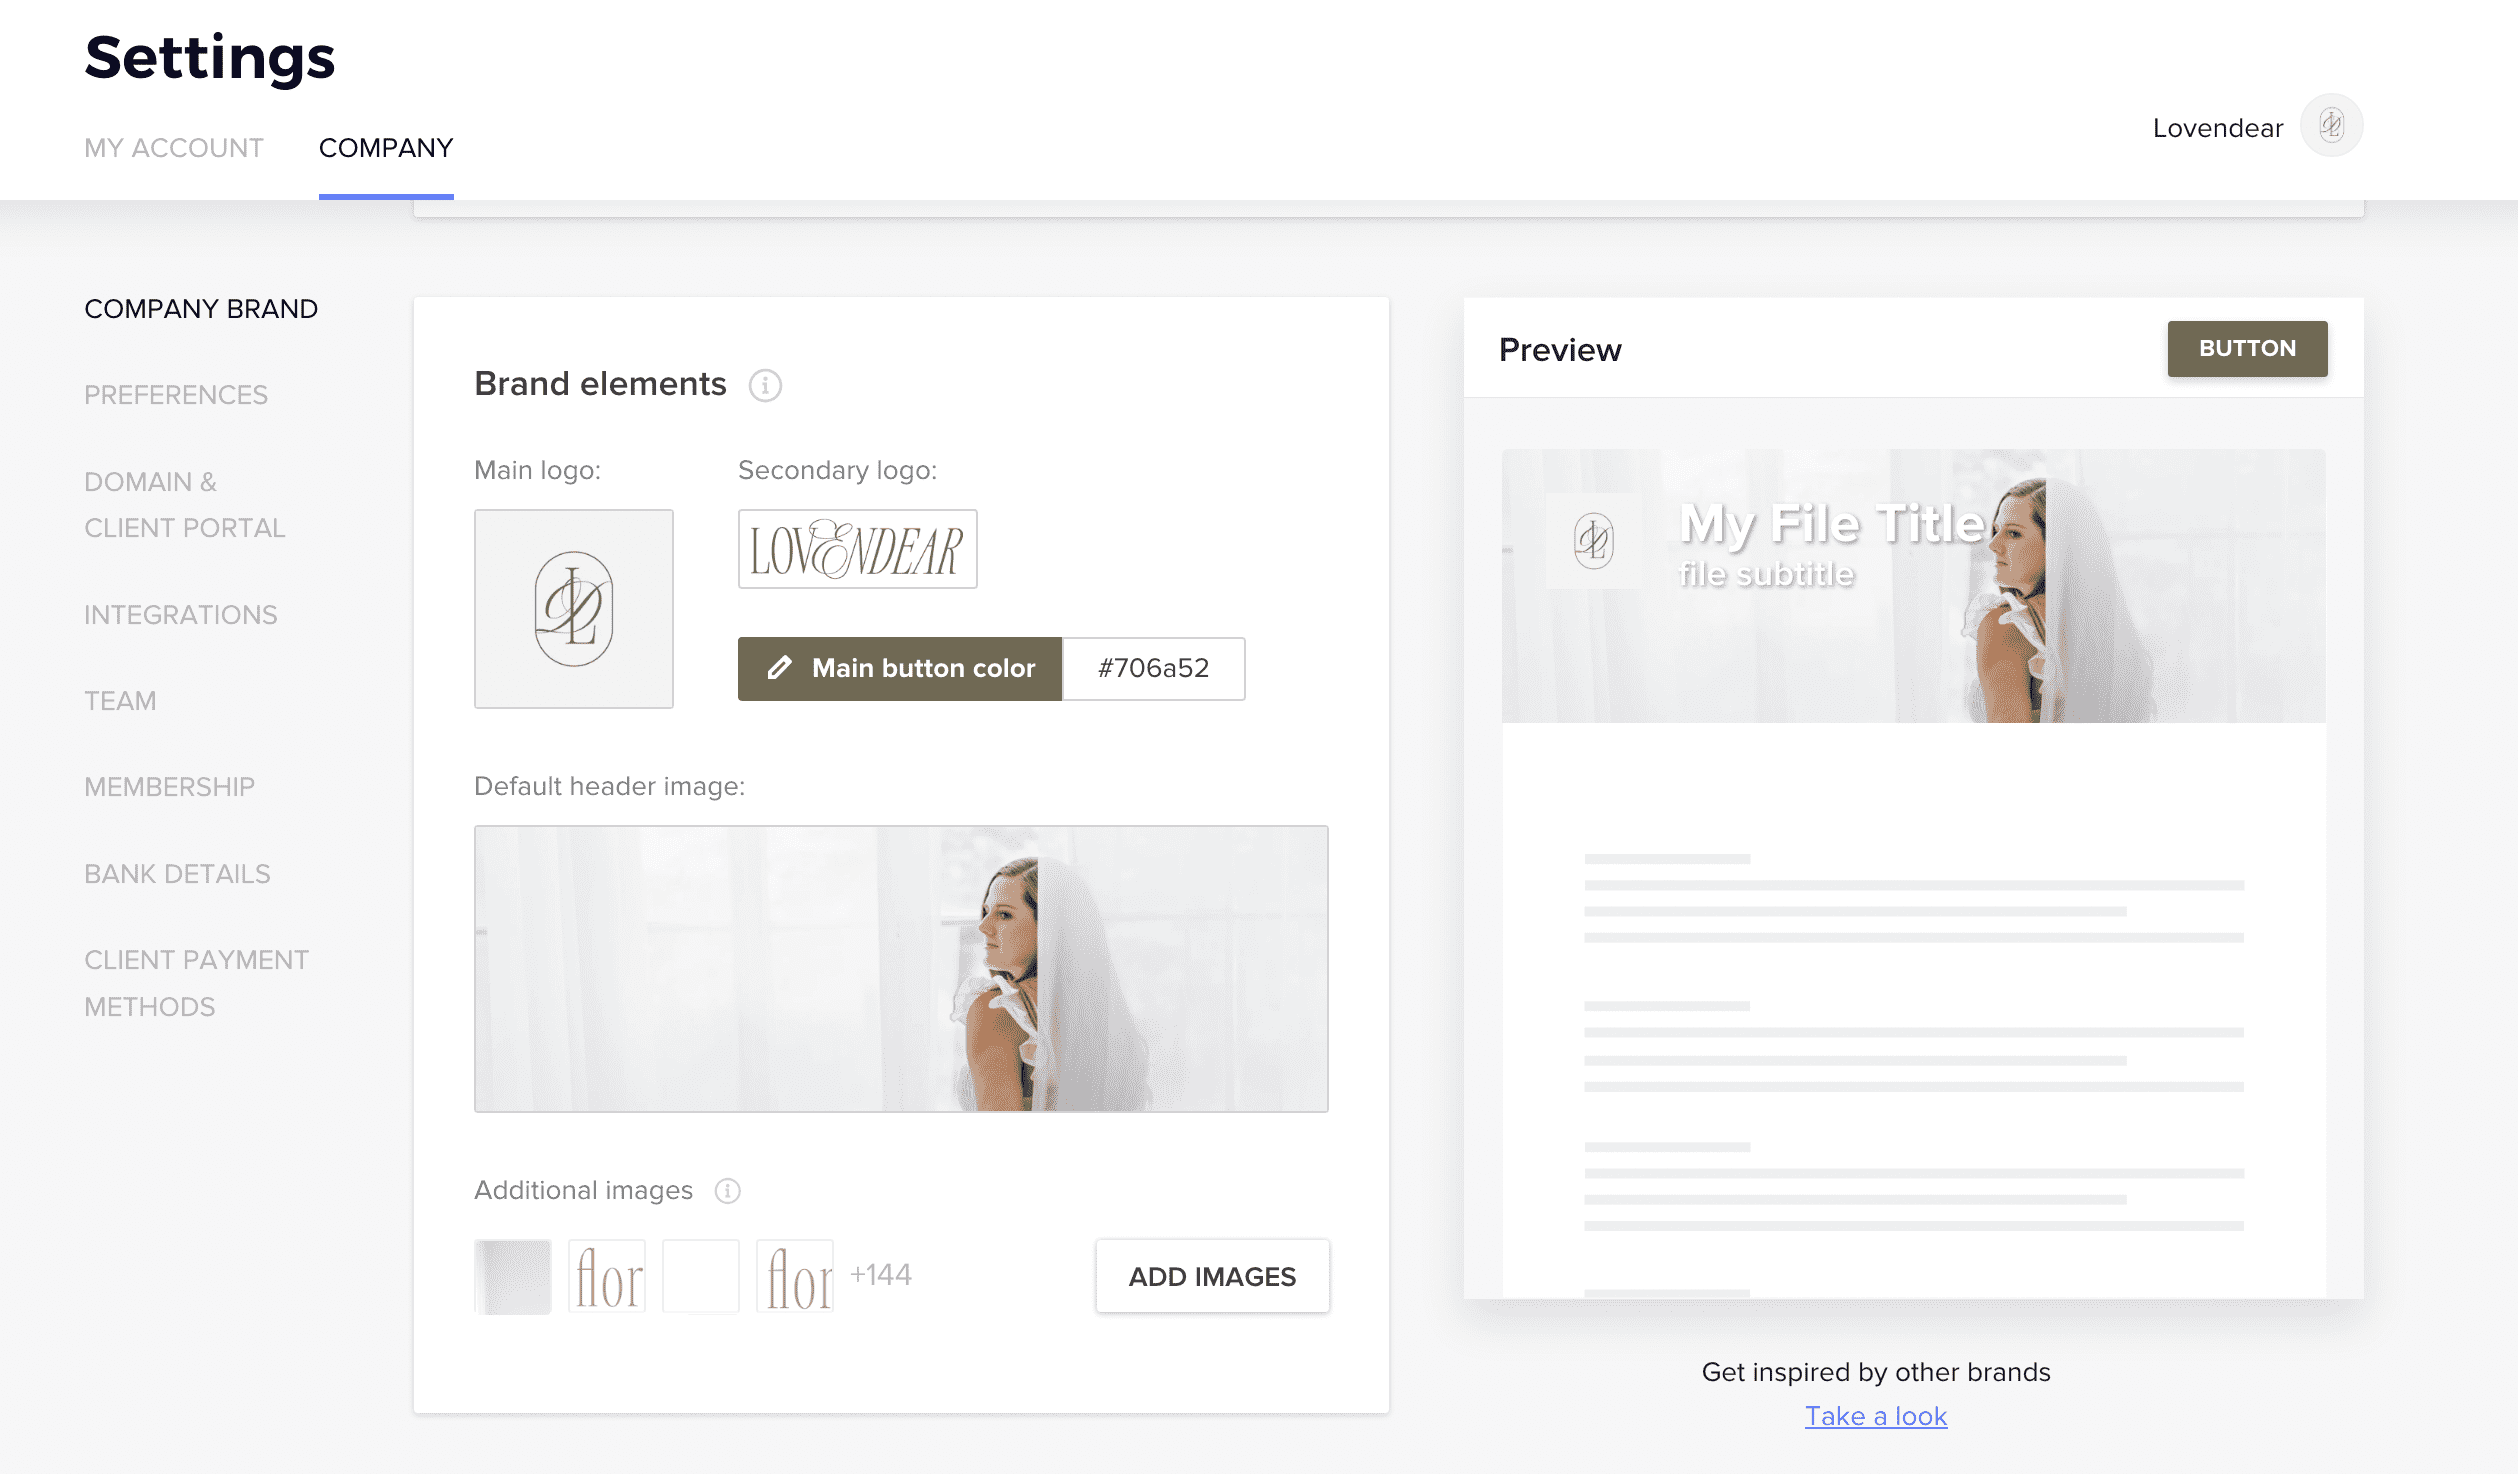
- Next, scroll down to the brand elements area to upload your primary and secondary logos. I suggest following their size recommendations when uploading your files.
- Customize the main button color and upload your default header image. I recommend adding any brand photography you would use when sending clients files. This will make it so much easier to swap out imagery to freshen up your smart files!
Customize Your Company Theme
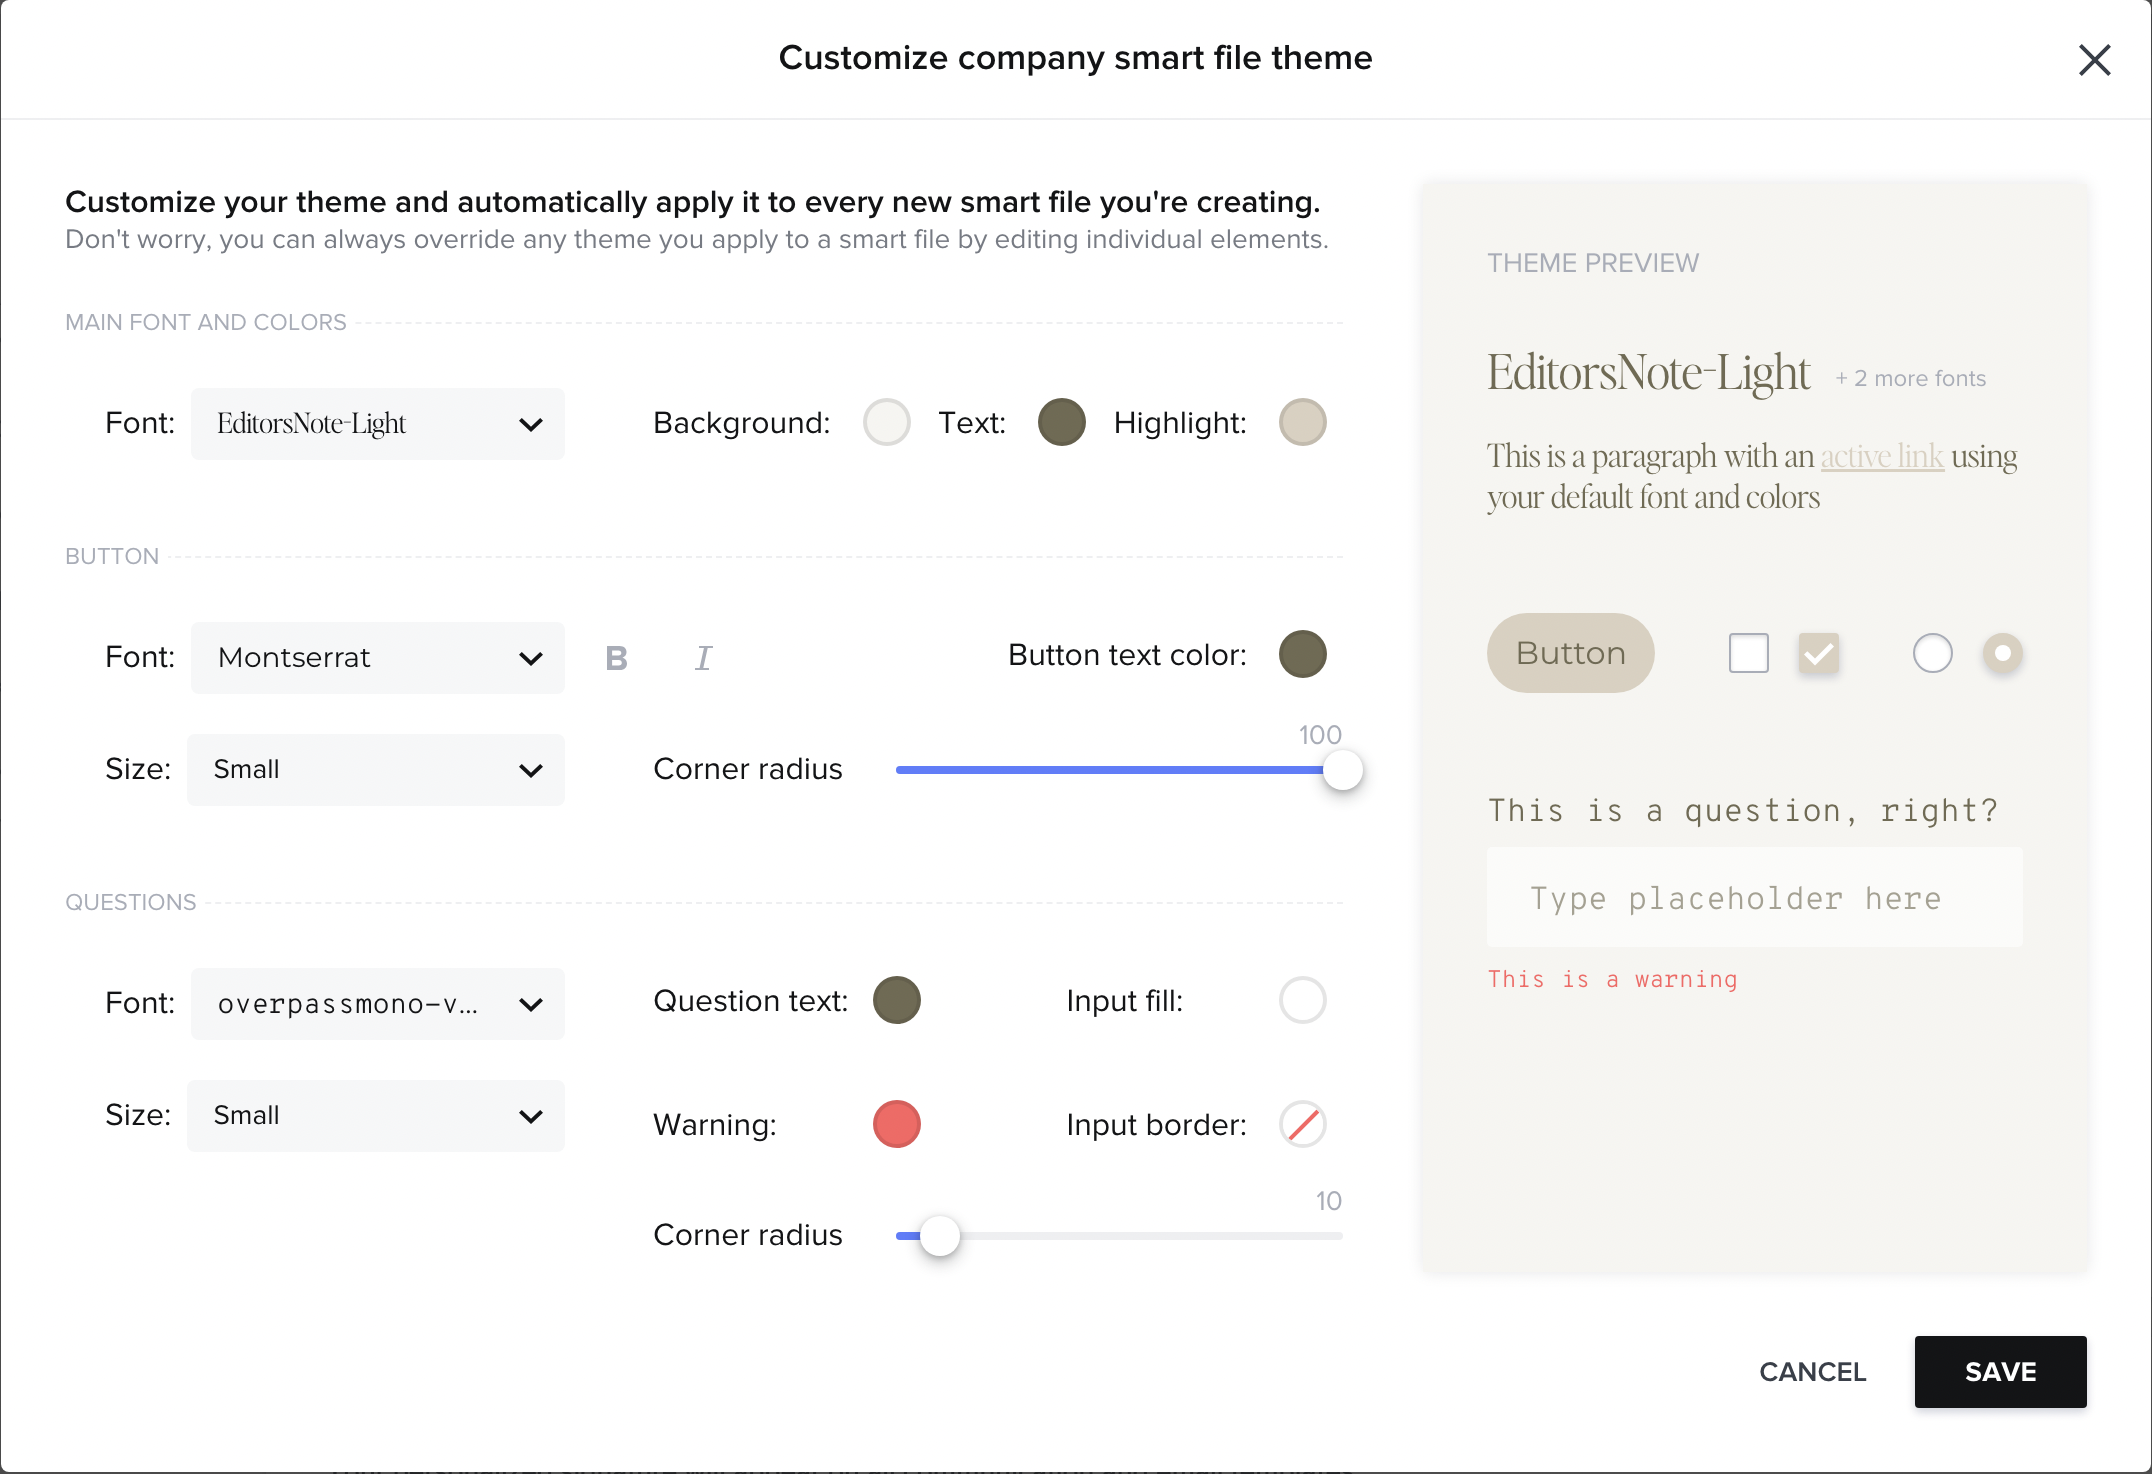
Additionally, there is an option to customize your company’s smart file theme settings. Customize these settings right underneath the brand elements area. Select the ‘Customize Company Theme’ button to select your fonts, colors, and buttons.
In this window, select your main fonts and colors, button settings, and the appearance of questions. For fonts, either select one of the system fonts or upload your own brand font. Please remember, to purchase any necessary font licenses when using premium fonts.
Add your own brand color value for the background, text, and highlight colors. The highlight color is used for buttons, active links, and any question selectors. You can also customize the corner radius of your buttons depending on how rounded you want the corners.
Be sure to customize the look of your questions as well. Select your font, size, text color, warning text color, and input appearance.
Curious what smart files are? Check out this post to learn more!
