Let’s be honest – the last thing creatives want to be is buried in admin work. We are fueled by creating, designing, photographing, and bringing ease and beauty to our clients. I’m here to help you get your time back using Honeybook to streamline your client process.
Trust me, I get it – the last thing we have time for is learning a new platform. Today, I’ll walk you through a few simple ways to use Honeybook to automate and streamline your client process — so you can save time and create a smoother experience from first inquiry to final invoice.
I have recorded a video tutorial of the step-by-step process of creating a Honeybook automation that you can watch below. If you prefer a written format, I will include that below as well.
Step 1 — Start with a Honeybook Contact Form
The first place to start is creating and embedding a Honeybook contact form onto your website. This allows inquiries to come straight into your Honeybook account. If you don’t use a Honeybook contact form, you will have to manually add clients into your Honeybook, making automations much more difficult.
When creating your contact form, it’s important to ask only what you need to know, not everything you are curious about. Ask questions to inform you about the current season or stage of your client, their budget, and what they are interested in. Select easy to read fonts and brand colors with a high contrast to make it easy to read and fill out.
[include GIF of creating HB Contact form]
How to embed the contact form to your website:
- Click ‘publish in the top right corner and a pop up window will appear.
- Select ‘copy code’ to copy the contact form embed code to your clipboard.
- Navigate to your website platform (I’ll use Showit for this tutorial) and locate where your contact form lives on your website.
- Paste the embed code via the embedding tool your website platform uses.
- Resize accordingly and publish the changes to your website
Now that you’ve embedded your contact form, you’re ready to start building your automation. Let’s get into it.
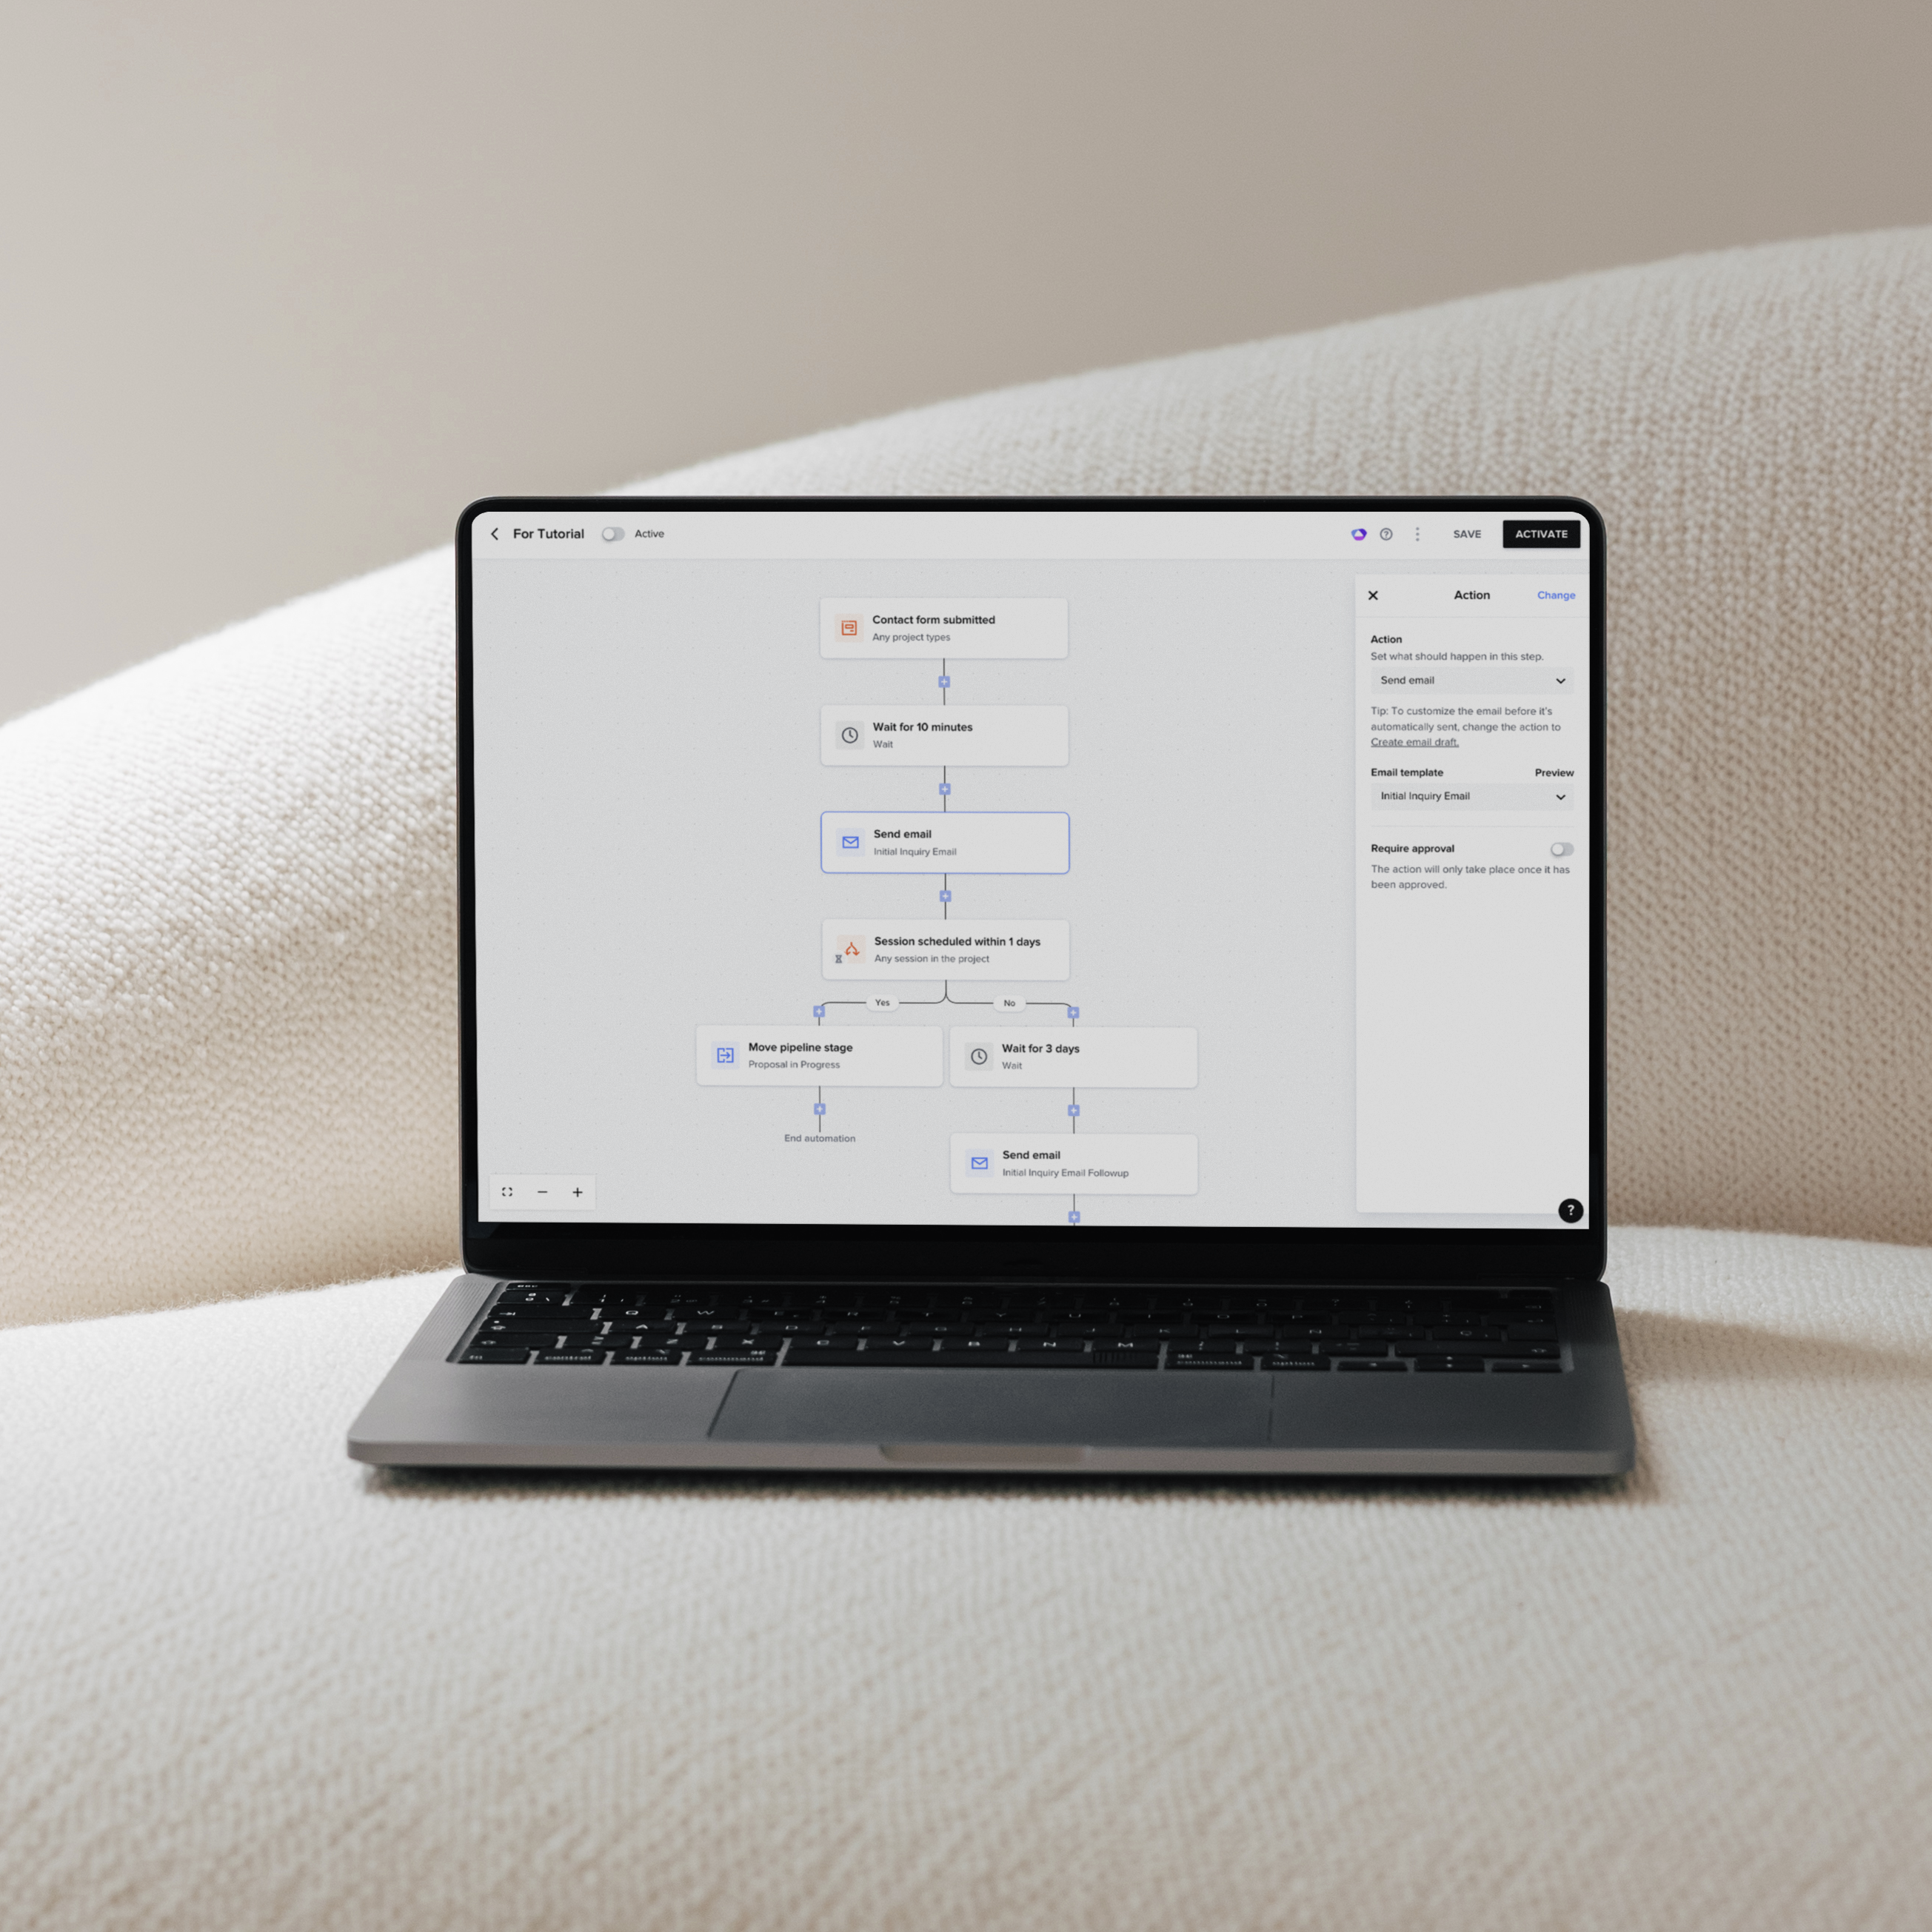
Step 2 — Build a Simple Automation Workflow for your Inquiry Process
Setting up automations in Honeybook CAN be complicated but doesn’t have to be. I’m going to walk you through a sample automation, explain the backend, and offer tips and suggestions.
To set up an inquiry automation:
- Navigate to the automations area in your Honeybook account
- Select ‘Create Automation’
- Select ‘Start from Scratch’ in the top right of the pop-up window
- Click ‘Contact form submitted’ in the right trigger menu
- Select which project types you wish to automate
- Select the plus icon to add an action
- Select either ‘send email’ or ‘send file via email’ (This depends on if you wish to send a pricing guide or other smart file with their initial inquiry response email)
- Select which file template you wish to send and the email template. (If you don’t have an email written yet, save the workflow, and go write a quick email for the initial inquiry response)
For today’s tutorial, we’ll stop there, but I will explain other backend options and conditions in case you wish to dive deeper into your automation. You can watch a further explanation in the video tutorial provided at the beginning of this post.
Step 3 — Impress your Clients with Professional Smart Files
Honeybook Smart Files are interactive files to help enhance customer experience. From scheduling to contracts, invoices, and questionnaires, you can send all client documentation with one platform. For an in-depth explanation of smart files, read my blog post walking you through it.
For your website inquiry workflow, I recommend sending your pricing information to potential clients via a beautifully designed pricing guide template. Although there are mixed reviews on whether or not to include pricing on your website, I have found tremendous benefits to providing at least bare minimum pricing before getting someone on a call. This prevents sticker shock and awkward money talk. When potential clients have a general range of your pricing, they will feel more comfortable and willing to meet with you.
If you’re in need of a professional and on-brand pricing guide, shop my templates here. Shameless plug 😉
Tips for making the most of your automated client process
Tip 1 — Keep your Automations Human
In an every growing world of technology and AI, our business processes can become to mechanical and cold. Be sure to maintain your brand voice when crafting emails and writing content for your client files. Use tools like Chat GPT and Gemini as a framwork and a brainstorming tool. Don’t just copy and paste responses. Those are smart platforms, but they’ll never be human. Your clients will be able to notice the difference between a computer and human thoughts and brain power 😉
Tip 2 — Keep your brand visuals consistent
Utilize your logos, brand fonts, colors, and additional visual elements to establish a professional and cohesive brand. When you constantly change your colors and fonts, current and potential clients become lost with who they are working with and decreases professionalism. Check out this blog post to guide you through setting up your brand in Honeybook.
Tip 3 — Keep Testing and Refining
Every business is different, which means every client experience and workflow is unique. Take the time to braindump your absolute dream client process. Comb through it several times, talk it out loud if you have to. And don’t be afraid to refine your workflow as you run real clients through it. That’s truly the only way to ensure it’s going to work for you and your clients.
Tip 4 — Use Smart fields in your file templates
When setting up your client-facing file templates, I suggest using smart fields to personalize. This is a tool that will automatically fill certain areas of your files with your client or project details and displays it as plain text. From the project name or date to email addresses, wedding date, guest count and more, this feature will truly save you so much time and headache when personalizing your files.
